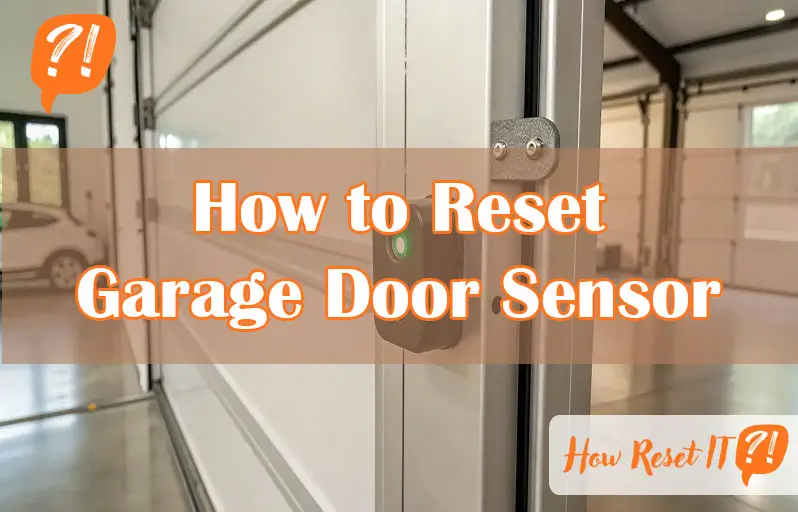
Is your garage door refusing to close or acting up unexpectedly? The culprit might be your garage door sensors.
These small but vital devices keep your garage safe by detecting obstacles and preventing accidents. When they get misaligned, dirty, or experience a glitch, your door can stop working properly. But don’t worry—you can fix this yourself by resetting the sensors.
In this guide, you’ll learn simple, step-by-step tips to reset your garage door sensors quickly and effectively. Keep reading to regain full control of your garage door and restore peace of mind to your home.
Power Disconnection
Power disconnection is the first step to reset your garage door sensor safely. It stops electricity flow to the opener. This prevents any accidents during the reset process. Always disconnect power before touching the sensor or opener parts.
Unplugging The Opener
Locate the power cord of your garage door opener. Pull the plug gently from the electrical outlet. Do not yank the cord to avoid damage. Keep the plug away from water or damp areas. This ensures the opener is fully powered off.
Ensuring Safety Precautions
Wear insulated gloves to protect against electric shocks. Check that the power is off by pressing the remote button. The door should not move or beep. Keep children and pets away from the work area. Avoid working in wet or slippery conditions.
Sensor Inspection
Inspecting the garage door sensors is crucial before attempting a reset. Sensors detect obstacles and ensure safe door operation. Faulty sensors often cause the door to stop or reverse unexpectedly. A close inspection helps identify simple issues that block sensor function. Clean, clear sensors work best for smooth garage door activity.
Checking For Obstructions
Look closely at the sensor area for any objects blocking the beam. Dirt, spider webs, or leaves often interfere with sensor signals. Remove any visible debris carefully. Make sure nothing is hanging in front of the sensors. Even small obstructions can cause the door to malfunction. Clear space ensures sensors communicate correctly.
Cleaning Sensor Lenses
Dust and grime on the sensor lenses reduce their effectiveness. Use a soft, dry cloth to wipe each lens gently. Avoid harsh cleaners that may damage the sensor surface. Clean lenses allow a clear path for the sensor beam. Regular cleaning prevents false errors and improves sensor reliability. Always handle sensors with care to avoid misalignment.
Sensor Alignment
Proper sensor alignment is key for your garage door to work safely. Sensors stop the door from closing on objects or people. Misaligned sensors cause the door to stay open or reverse. Checking and fixing sensor alignment is simple. Follow these steps to ensure your garage door sensors work right.
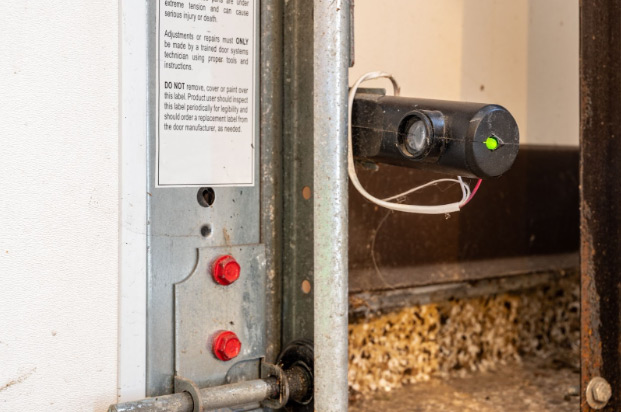
Identifying Sensor Lights
Look at the sensor lights near the bottom of the door frame. One sensor usually shows a steady green light. The other sensor may show a yellow or orange light. Green means the sensor is working and aligned. Yellow or blinking light means the sensor might be out of alignment. No light or red light means a problem with the sensor or wiring. These lights help you know if the sensors face each other correctly.
Adjusting Sensor Position
Gently loosen the screws holding the sensors in place. Move the sensors slightly until both lights show solid green. The sensors must face each other directly. Avoid any obstacles between sensors. Tighten screws to keep sensors steady. Test the door by closing it slowly. If the door closes without reversing, the sensors are aligned correctly. Repeat the adjustment if needed. Proper sensor position keeps your garage door safe and functional.
Realignment Tips
Realigning your garage door sensors is key to restoring proper function. Sensors must face each other directly. Small misalignments cause the door to stop or reverse. Follow these tips to adjust the sensors carefully and ensure smooth operation.
Loosening Brackets
Start by loosening the sensor brackets gently. Use a screwdriver to turn the screws just enough to move the sensors. Avoid fully removing the screws. This lets you adjust the sensor position without losing their mounting. Loosen both sensor brackets to make fine adjustments easier.
Securing Sensor Placement
Align the sensors so their lenses face each other perfectly. Check for any dirt or debris on the sensors and clean them. Tighten the screws slowly to fix the sensors in place. Make sure they do not shift as you tighten. Test the sensor lights to confirm proper alignment before securing fully.
Power Restoration
Power restoration plays a key role in resetting your garage door sensor. Without power, the sensors cannot operate properly. Restoring power allows the sensors to recalibrate and resume normal function. This step often fixes simple sensor issues after a power outage or maintenance.
Plugging Opener Back In
Start by plugging the garage door opener back into the power outlet. Make sure the outlet is working by testing it with another device. Avoid loose connections that can cause power interruptions. Once plugged in, wait a few moments for the opener to power up fully. This gives the system time to reset internally.
Testing Sensor Functionality
After restoring power, test the sensors to confirm they work correctly. Observe the indicator lights on each sensor for proper color signals. Typically, a solid green light means the sensor is aligned and active. Try closing the garage door using the remote or wall control. The door should close smoothly without reversing.
Troubleshooting Common Issues
Troubleshooting common issues with garage door sensors helps keep your door working safely. Sensors can stop working due to dirt, misalignment, or wiring problems. Knowing how to check the sensor lights and fix persistent issues saves time and costs. This section guides you through simple steps to identify and solve sensor problems.
Interpreting Light Colors
Garage door sensors have small lights that show their status. A steady green light usually means the sensor works well. A blinking green or yellow light can mean the sensor is trying to connect or is misaligned. Red or no light means the sensor may not get power or is broken. Understanding these colors helps find the sensor’s problem quickly.
Check both sensors on each side of the door. One sensor often shows a yellow or orange light, while the other shows green. This is normal if the door closes fine. If the door won’t close, check if sensors face each other directly and clear any dirt or spider webs.
Dealing With Persistent Problems
Sometimes, cleaning and aligning sensors do not fix the problem. Start by unplugging the garage door opener for a minute, then plug it back in to reset the system. Look for loose wires or damaged parts around the sensors. Replace batteries in wireless sensors if needed.
If the door still won’t close, test the sensors with a flashlight or cover one sensor to see if the door stops moving. This can tell if sensors detect objects correctly. Call a professional if the issue continues or if you are unsure about electrical parts. Regular sensor checks keep your garage door safe and working well.
Model-specific Reset Steps
Resetting your garage door sensor often depends on the model you have. Each brand and type may require different steps to reset the sensors properly. Following model-specific instructions helps avoid damage and ensures the sensors work correctly. Understanding these steps makes the process faster and safer.
Consulting The Manual
The user manual is the best source for model-specific reset steps. It usually includes detailed instructions tailored to your garage door sensor. Manuals often explain the location of reset buttons and any special procedures. Keep your manual handy during the reset process.
If you lost your manual, check the manufacturer’s website. Many brands offer digital copies available for download. Search by model number to find the exact guide for your sensor.
Locating Reset Buttons
Reset buttons vary in location depending on the sensor model. Common places include the sensor housing, the garage door opener unit, or near the light cover. Some sensors hide the button behind a small panel or cover.
Look carefully for small, recessed buttons that may need a tool to press. Press and hold the reset button for a few seconds, then release. This action usually resets the sensor’s settings and clears errors.

Frequently Asked Questions
Why Is One Garage Door Sensor Yellow And The Other Green?
One sensor shows yellow (transmitting), the other green (receiving). Green means proper alignment; yellow is normal for the sender.
How To Realign Garage Door Sensor?
To realign garage door sensors, loosen mounting brackets, adjust sensors until indicator lights turn solid green, then tighten brackets securely. Ensure sensors face each other directly without obstructions for proper alignment.
Where Is The Reset Button On A Garage Door?
The reset button on a garage door opener usually sits behind the light cover or near the motor unit. Unplug the opener first, then press the reset button. Check your manual for exact location and instructions, as it varies by model.
How To Fix Garage Sensor Yellow Light?
Unplug the garage door opener. Clean sensor lenses gently with a damp cloth. Realign sensors until lights turn solid green. Plug opener back in to reset.
How Do I Reset My Garage Door Sensor Easily?
Unplug the opener, wait 30 seconds, then plug it back to reset the sensor.
Conclusion
Resetting your garage door sensor is simple and keeps your door safe. Always check sensor alignment and clean the lenses. A quick reset can fix most common issues. Regular maintenance helps avoid sensor problems in the future. Follow these easy steps to ensure smooth garage door operation.
Stay safe by keeping sensors working properly every time.