You just changed the battery in your carbon monoxide detector, but now it keeps beeping or won’t stop flashing. What’s going on?
If you’ve ever faced this frustrating moment, you’re not alone. Resetting your carbon monoxide detector after replacing the battery is a simple but crucial step to make sure your home stays safe and your alarm works properly. In this guide, you’ll learn exactly how to reset your detector quickly and easily—so you can stop the noise and get peace of mind.
Keep reading, because missing this step could mean your alarm won’t protect you when you need it most.
Signs Of Battery Replacement
Knowing the signs that your carbon monoxide detector needs a new battery helps keep your home safe. These signs often appear before the alarm stops working properly. Recognizing them quickly ensures you replace the battery on time. This section explains the common signs that show your detector needs a battery change.
Low Battery Chirping
The most common sign is a soft chirping sound. It usually happens every minute or so. This chirp warns you the battery is running low. The sound is different from the loud alarm for carbon monoxide. Ignoring this chirp can cause the detector to stop working suddenly.
Intermittent Beeps
Sometimes the detector gives off random beeps. These beeps do not follow a regular pattern. They may happen more than once in a short time. Intermittent beeps often mean the battery is weak or not properly connected. Check the battery and replace it if needed to stop these beeps.
Alarm Behavior Changes
Your detector may act strangely when the battery is low. The alarm might sound briefly without any danger. It may also reset itself or fail to sound during tests. These behavior changes warn you the battery power is fading. Replace the battery to restore normal alarm function.

Locating The Reset Button
After changing the battery in your carbon monoxide detector, locating the reset button is crucial. This button restarts the device and clears any error signals. Knowing where to find it saves time and ensures your safety. Different models have the reset button in various spots. Understanding these locations helps you reset the alarm quickly and correctly.
Common Button Placement
The reset button usually sits on the front of the detector. Often, it is near the center or bottom of the device. Some models have it on the side or back. It may be labeled “Reset” or “Test/Reset.” The button is often small and round. Look for a slightly raised or textured surface. It might be a different color to stand out.
Test Vs. Reset Functions
Many carbon monoxide detectors have separate test and reset buttons. The test button checks if the alarm works by sounding it briefly. The reset button clears alerts after battery changes or false alarms. Sometimes, the test button also acts as the reset button. Pressing and holding it for a few seconds can reset the detector. Read your alarm’s manual to confirm the exact function.
Combined Buttons
Some models use one button for both testing and resetting. This button is often labeled “Test/Reset.” Press it once to test the alarm. Hold it down longer to reset the device after a battery change. This design simplifies the panel and reduces confusion. If unsure, try pressing the button briefly first. Then hold it for about 10 seconds if the alarm does not reset.
Standard Reset Procedure
Resetting your carbon monoxide detector after changing the battery is important. It ensures the device works properly and keeps you safe. The standard reset procedure is simple and quick. Follow these steps carefully to return your detector to full operation.
Pressing The Reset Button
Locate the “Test/Reset” button on the front of the detector. Press and hold this button for about 15 seconds. This action clears any error signals from the device. Release the button once you hear a beep or see a light flash.
Confirmation Signals
The detector will give a clear signal to show it is resetting. Usually, you will hear a single beep or see a blinking light. These signs confirm the detector has accepted the new battery. If there is no signal, repeat the reset step.
Returning To Monitoring Mode
After the confirmation signals, the detector returns to normal monitoring mode. It will now actively check for carbon monoxide. Ensure the detector is mounted securely on the wall or ceiling. Regularly test it to keep your home safe.
Battery Removal Reset
Resetting your carbon monoxide detector by removing the battery is a simple and effective method. This process clears any error signals and restarts the unit. It helps the detector function correctly after battery replacement. Follow these steps carefully for a smooth reset.
Detaching The Alarm Unit
Start by locating the detector on your wall or ceiling. Hold the base firmly and twist the alarm unit counterclockwise. Gently pull the detector away from its mounting bracket. Place the unit on a flat surface for easy access to the battery compartment.
Removing The Battery
Open the battery compartment cover. Remove the old battery carefully to avoid damage. Leave the battery out for about 10 seconds. This pause allows the detector to reset internally. Check the compartment for dust or debris and clean if needed.
Reinstalling And Resetting
Insert a fresh battery into the compartment, matching the positive and negative ends. Close the battery cover securely. Align the alarm unit with the mounting bracket. Twist it clockwise until it clicks into place. Press the Test/Reset button until you hear a beep. This confirms the reset and proper function.
Factory Reset For Specific Models
Factory resetting your carbon monoxide detector can solve persistent issues after changing the battery. Some models require a specific reset process to clear errors and restore normal function. This section covers steps for popular brands with detailed instructions.
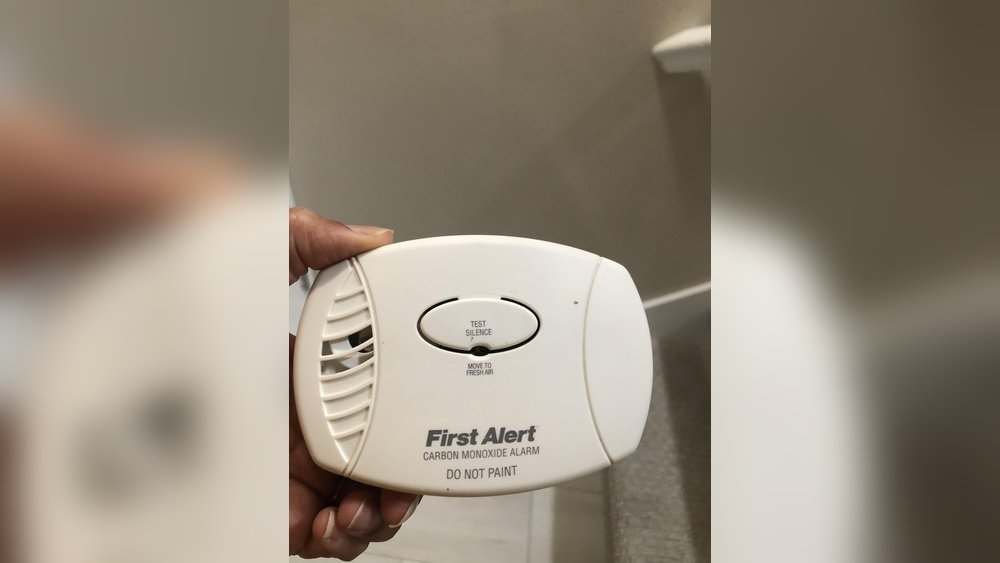
First Alert Reset Steps
First Alert detectors often need a factory reset after battery replacement. Open the battery compartment and remove the batteries. Press and hold the test button firmly. While holding it, reinsert the battery tray back into place. Keep holding the button until you hear a long beep. This beep confirms the reset is complete. Release the button and allow the unit to restart. The detector should now be fully reset and ready to use.
Holding The Test Button
Pressing and holding the test button is key for many resets. Hold the button for at least 15 seconds. Do not release the button too soon. The detector uses this signal to erase old settings. It will then initialize fresh settings from the factory. This method works with several models beyond First Alert. Make sure to keep steady pressure during this time. If the beep does not sound, try again or check the manual.
Recognizing Reset Confirmation
Listen carefully for confirmation sounds after reset steps. A long beep usually means the reset succeeded. Some models flash lights instead of beeping. The pattern may be one long flash or several short flashes. Check your user guide for the exact signal. If no confirmation occurs, the reset might have failed. Repeat the process or replace the batteries again. Proper confirmation ensures your detector monitors safely.
Troubleshooting Persistent Beeping
Persistent beeping from a carbon monoxide detector after a battery change can cause worry and confusion. This noise often signals that the device needs attention beyond just swapping batteries. Understanding simple troubleshooting steps can help stop the beeping and ensure the detector works correctly. Follow these practical tips to resolve the issue quickly and safely.
Cleaning The Detector
Dust and dirt can block the sensor, causing false alarms or beeping. Use a soft brush or vacuum cleaner to gently remove debris from the vents. Avoid using water or cleaning chemicals, as they may damage the detector. Regular cleaning keeps the sensor clear and helps maintain accurate readings.
Checking Battery Freshness
New batteries might still be old or defective. Test the batteries with a battery tester or replace them with fresh ones from a reliable brand. Low battery power often triggers chirping sounds. Always use the correct battery type recommended by the manufacturer for best results.
Proper Placement Tips
Place the detector away from kitchens, bathrooms, or heating appliances. High humidity or steam can cause false alarms. Mount the detector on the ceiling or high on a wall, following the user manual’s guidelines. Good placement reduces false beeping and keeps the device effective.
Consulting The User Manual
The user manual holds specific instructions for your detector model. It explains how to reset the device after a battery change. Follow the step-by-step reset process exactly as described. The manual also lists error codes and troubleshooting tips to fix persistent beeping problems.
When To Replace The Detector
Knowing when to replace your carbon monoxide detector is crucial for your safety. These devices do not last forever. Over time, their sensors wear out. A detector that no longer works properly can put your household at risk. Regular checks and understanding the signs of aging help keep your home protected.
End Of Life Indicators
Most carbon monoxide detectors have built-in end of life signals. These alerts warn you when the device must be replaced. You might hear a series of beeps or see a flashing light. The pattern differs by model, so check your manual. Ignoring these signals can lead to false alarms or no alarm at all.
Malfunction Signs
Malfunctions can show up as frequent beeping or no response during tests. If the alarm chirps even after changing the battery, the sensor might be failing. A detector that fails to sound during a test is also a red flag. Dust, dirt, or age can cause these issues. Clean the unit first, then consider replacing it if problems persist.
Date Stamp Verification
Check the manufacturing or installation date on your detector. Most units last between five to seven years. If your detector is older than this, replacement is necessary. The date is often found on the back or inside the battery compartment. Keeping track of the date helps you plan timely replacements and stay safe.

Testing After Reset
After changing the battery and resetting your carbon monoxide detector, testing it ensures proper operation. This step confirms the device can detect dangerous levels and alert you in time. A working alarm protects your home and family from carbon monoxide poisoning.
Testing is simple and quick. It involves using the built-in test button and listening carefully for alarm sounds. Follow these steps to verify your detector works well after a reset.
Using The Test Button
Locate the test button on the front of your carbon monoxide detector. Press and hold it for a few seconds. The device will run a self-check and simulate an alarm.
Release the button once you hear the sound or see indicator lights. This test confirms the battery and sensor are functioning properly.
Listening For Alarm Sounds
Listen carefully for the alarm’s loud beep or series of beeps. The sound should be clear and strong. A faint or no sound means the detector may not work correctly.
Repeat the test if needed. Ensure the detector is in an open area without obstructions during testing.
Ensuring Functionality
Check the device’s indicator lights after the test. A green or flashing light usually shows normal operation. A red or no light signals a problem.
Make sure the detector is securely mounted and placed in the right location. Proper placement ensures reliable detection of carbon monoxide.

Frequently Asked Questions
How Do I Reset My Kidde Carbon Monoxide Alarm After Changing The Battery?
Press and hold the “Test/Reset” button on your Kidde alarm for 15 seconds after replacing the battery. Release it and wait for a beep or light flash. This confirms the reset and returns the unit to monitoring mode.
What Would You Do First If A Carbon Monoxide Detector Continues Chirping After New Batteries Are Placed In It Or If The Alarm Sounds?
First, move to fresh air immediately and call emergency services. Then, press the detector’s reset button. If chirping continues, remove and reinstall the battery or replace the unit if it’s expired. Regularly clean and check placement to prevent false alarms or malfunctions.
How Do I Reset A Carbon Monoxide Sensor?
Press and hold the “Test/Reset” button until the alarm beeps or flashes. For persistent issues, remove the battery, wait 10 seconds, reinstall, then press reset again. Refer to the user manual for model-specific instructions or factory reset procedures.
How Do I Get My Alarm To Stop Beeping After I Change The Battery?
Press and hold the Test/Reset button on your alarm for 15-20 seconds. Release it after a beep or light flash. This stops the beeping and resets the unit. Remove and reinstall the battery if it continues. Clean the alarm and check placement if problems persist.
How Do I Reset My Carbon Monoxide Detector After Battery Change?
Press and hold the “Test/Reset” button until you hear a beep or see a light flash.
Conclusion
Resetting your carbon monoxide detector after changing the battery is simple and important. Always press the test/reset button to confirm it works. Removing and reinstalling the battery can fix persistent issues. Keep your detector clean and correctly placed to avoid false alarms.
Regular checks ensure your safety at home. Stay alert and maintain your device often. A working detector protects you and your family from danger.