
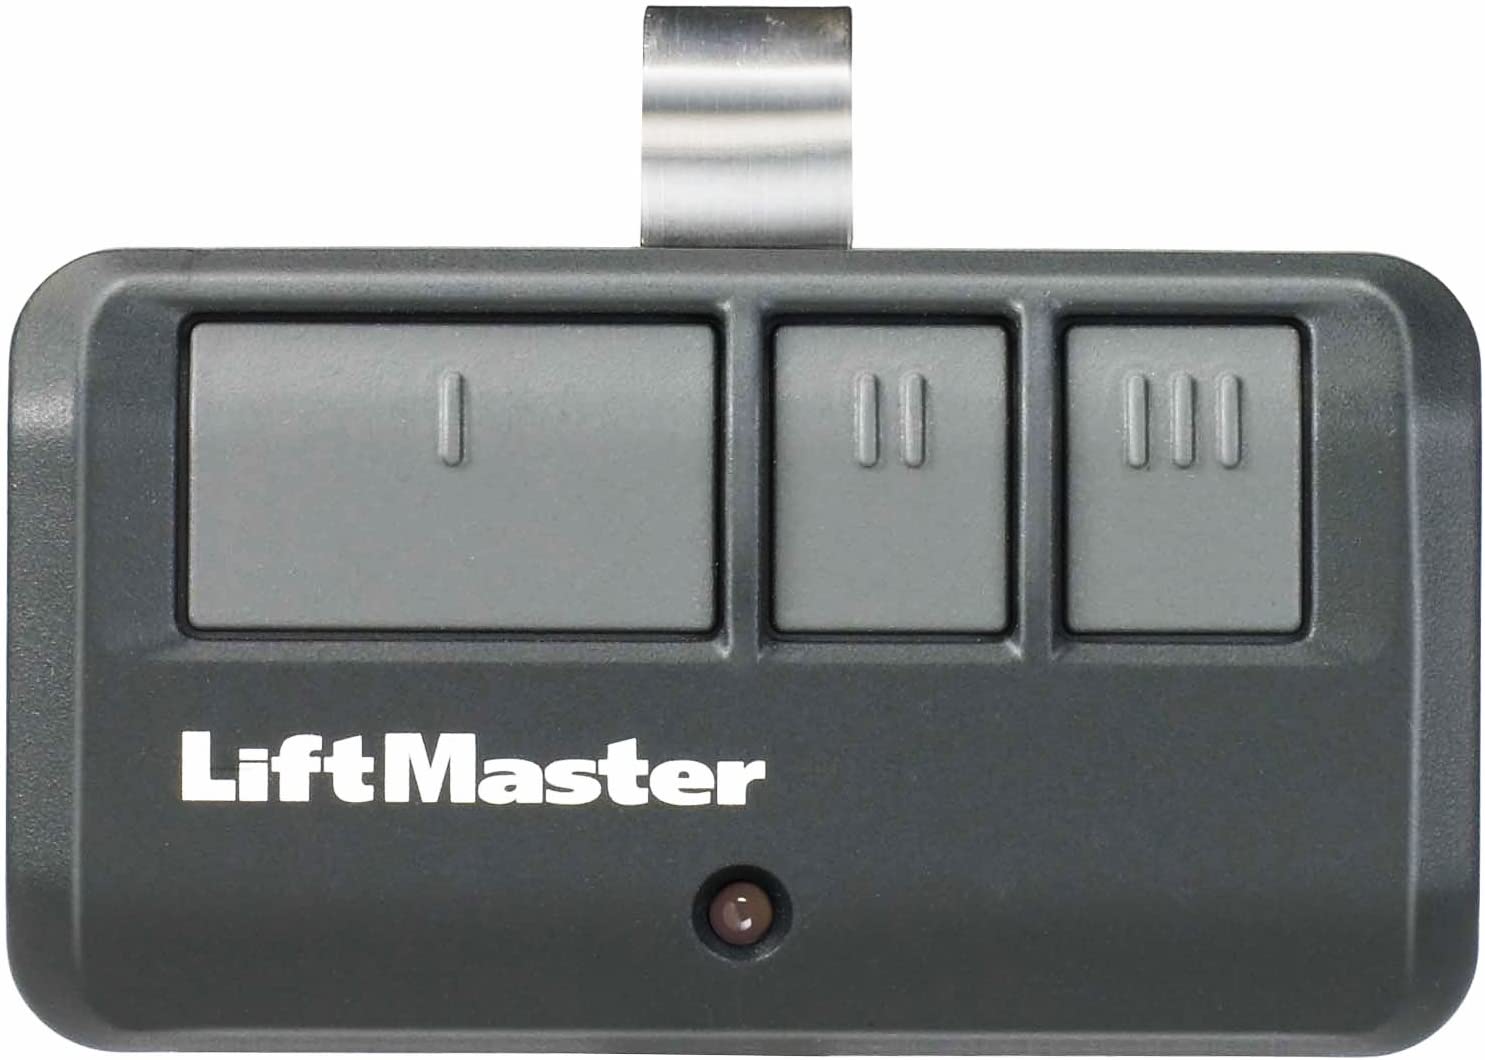
If your LiftMaster remote isn’t working like it used to, you’re not alone—and the fix might be simpler than you think. Resetting your LiftMaster remote can solve common issues like unresponsiveness or connection problems, giving you control back in just a few easy steps.
Whether you want to clear old codes or program a new remote, this guide walks you through everything you need to know. Keep reading, and you’ll have your garage door opener working smoothly again in no time.
Locate The Learn Button
Locating the Learn button is the first step in resetting your LiftMaster remote. This button allows you to clear old codes and add new ones. It plays a key role in programming your remote to work with your garage door opener. Knowing where to find it saves time and avoids frustration.
Common Button Colors
The Learn button often appears in different colors. Yellow, purple, red, and green are the most common. The color depends on your LiftMaster model and the year it was made. Some models have a black or white button instead. Identifying the button by color can help you find it faster.
Button Placement Tips
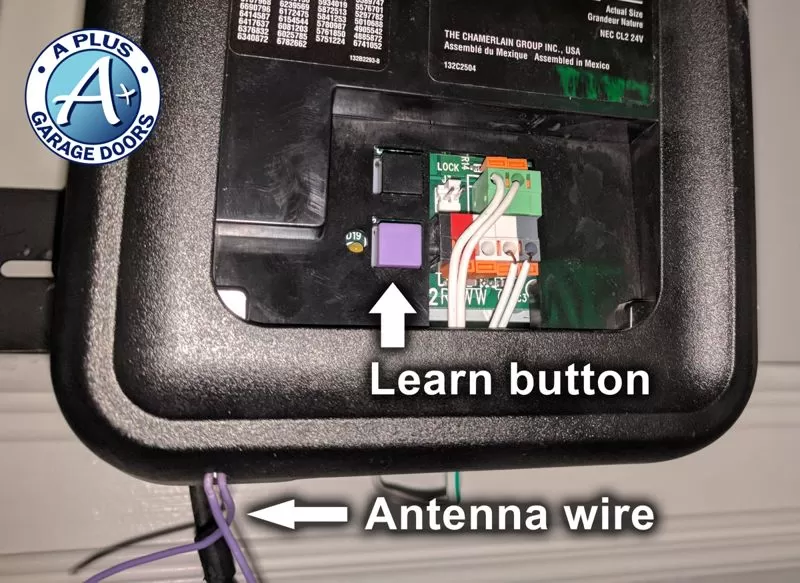
The Learn button is usually on the garage door opener motor unit. It is often behind a light cover or near the antenna wire. Look at the back or side of the motor for a small square or round button. Sometimes, the button is next to the power cord or near the circuit board. Use a flashlight if your garage is dark.
Clear Remote Memory
Clearing the memory of your LiftMaster remote helps fix connection issues. It removes all stored codes, allowing fresh programming. This step is essential if the remote controls multiple doors or has errors.
Two main reset methods exist: soft reset and hard reset. Each offers different levels of clearing memory. Choose the one that suits your situation best.
Soft Reset Procedure
Press and hold the remote button you want to clear. Hold it until the LED light blinks rapidly. This signals the code is erased from the remote memory.
Release the button and test if the remote no longer controls the door. This method clears only the selected button’s code, not all stored codes.
Hard Reset Procedure
Locate the “Learn” button on your garage door opener motor. Press and hold the “Learn” button for about 6 seconds until the LED light turns off.
This action erases all remote codes stored in the opener’s memory. You must reprogram all remotes after a hard reset to restore control.
Use this reset if multiple remotes have issues or you want to start fresh with new codes.
Reprogram The Remote
Reprogramming your LiftMaster remote is essential after a reset. This process connects your remote to the garage door opener again. It ensures your remote works smoothly and securely. Follow the steps carefully for a successful reprogramming.
Activate Learn Mode
Start by finding the Learn button on your garage door opener. It is usually under the light cover on the motor unit. The button might be yellow, red, purple, or black. Press and release the Learn button once. The Learn LED light will turn on, indicating the opener is in Learn mode. You have about 30 seconds to complete the next step.
Sync Remote With Opener
Press and hold the button on your remote that you want to program. Keep holding until the garage door opener light blinks or you hear a click. This signals the remote synced successfully with the opener. Release the button on the remote. Test the remote by pressing the programmed button to open or close the garage door. Repeat the process if you have multiple remotes to program.
Test The Remote
Testing the LiftMaster remote is a crucial step after resetting it. This process ensures the remote communicates correctly with the garage door opener. Without testing, you won’t know if the reset was successful or if further adjustments are needed.
Testing involves pressing the remote buttons to check if the garage door responds. This simple action confirms whether the remote sends the right signals. It also helps identify any problems early, saving time and frustration.
Confirm Successful Programming
Press the programmed button on your remote. Watch the garage door for movement or listen for sound. If the door opens or closes, programming was successful. The remote now controls the door as intended. No response means the remote did not program correctly. Repeat the programming steps carefully if needed.
Troubleshoot Common Issues
No garage door response can mean a weak remote battery. Replace the battery and try again. Check if the remote is within range of the opener. Remove any obstacles between the remote and the unit. Confirm the opener’s learn button was pressed during programming. If problems persist, reset and reprogram the remote from the start.
Reset Older Models
Older LiftMaster remote models use simpler technology than newer ones. Resetting these remotes often requires handling physical dip switches or matching manual codes. These methods help clear previous settings and allow fresh programming. Understanding these techniques is key to restoring your remote’s function.
Using Dip Switches
Dip switches are tiny switches inside the remote and garage opener. Each switch can be set to ON or OFF positions. To reset, open the remote’s cover carefully.
Locate the dip switches and move each one to a new position. Make sure the switches in the remote match the ones in the garage opener unit. Changing their pattern clears old codes.
After adjusting, close the remote cover and test the remote. This method resets the remote by creating a new signal code. It works well for older LiftMaster models.
Manual Code Matching
Manual code matching involves syncing the remote to the garage opener using a set of buttons. Start by pressing the “Learn” button on the opener motor. This button is usually near the antenna wire.
Press the button on your remote that you want to program. Hold it until the garage opener light blinks or you hear a click. This confirms the code has been accepted.
This process erases old codes and links the remote with the opener. Manual code matching is a reliable reset method for older remotes without digital displays.
Remove A Single Remote
Removing a single remote from your LiftMaster garage door opener is a useful way to control access. This process helps you erase only the unwanted remote without affecting others. It keeps your garage secure while saving the settings of your other remotes.
Follow the simple steps to remove one remote safely and easily. This method avoids resetting the entire system.
Erase Specific Codes
Start by locating the “Learn” button on your LiftMaster unit. It is usually under the light cover or near the antenna wire. Press and hold the “Learn” button until the indicator light turns on. Then, press the button on the remote you want to erase. The indicator light will blink or turn off, confirming the remote’s code is deleted.
Reprogram Remaining Remotes
After erasing one remote, check that your other remotes still work. If any remote does not respond, reprogram it by pressing the “Learn” button briefly. Next, press the button on the remote you want to add. Repeat this for all remotes you wish to keep active. This keeps your system secure and functional without losing all programmed remotes.
Tips For Different Brands
Resetting a LiftMaster remote can vary slightly depending on the brand of your garage door opener. Different brands use distinct colors, timing, and button functions. Knowing these differences helps avoid frustration and speeds up the reset process. Below are important tips to keep in mind when working with various garage door opener brands.
Liftmaster Vs Chamberlain
LiftMaster and Chamberlain remotes share many features but have key differences. LiftMaster often uses a red or purple “Learn” button on the opener motor. Chamberlain models typically have a yellow “Learn” button. The location of this button can also vary slightly between models. Pressing this button starts the reset or programming mode.
Both brands require you to press the remote button after activating the learn mode. However, the timing for pressing the remote button can differ. For LiftMaster, you usually have about 30 seconds to press the remote button. Chamberlain often allows a shorter window, around 10 to 15 seconds. Knowing this helps ensure the remote pairs correctly.
Color And Timing Variations
The color of the “Learn” button is a quick way to identify the brand and reset method. Purple, red, and yellow are common colors. Purple and red mostly appear on LiftMaster models, while yellow is common on Chamberlain and other brands. Each color may indicate a different reset protocol.
Timing also matters. Some brands require you to hold the “Learn” button for a few seconds to clear all codes, while others need a quick press. After pressing “Learn,” the indicator light may blink or stay solid. This light signals when to press the remote button. Missing the correct timing can cause the remote not to reset properly.

Frequently Asked Questions
How Do I Reset The Garage Door Opener Remote?
Press and release the Learn button on the garage door opener motor. Then, press and hold the remote button until the opener’s light blinks or you hear a click. This resets and reprograms the remote. Test the remote and repeat if needed.
How Do I Relink My Liftmaster Remote?
Press and release the Learn button on your LiftMaster opener. When the LED lights up, press and hold your remote button. Release when the opener’s lights flash or you hear clicks. Test the remote to confirm the connection. Repeat if needed.
How To Reprogram Garage Door Remote?
Press the “Learn” button on the opener until its light glows. Then, press your remote button until the light flashes or clicks. This confirms successful reprogramming. For older models, match dip switches inside the remote and opener receiver. Test the remote to ensure it works properly.
Why Is My Liftmaster Garage Door Remote Not Working?
Your LiftMaster remote may not work due to dead batteries, signal interference, or needing reprogramming. Check batteries first. Press the opener’s “Learn” button, then press the remote button to reprogram. Clear any obstructions and ensure the remote is within range.
How Do I Reset My Liftmaster Remote Control?
Press and hold the remote’s button while pressing the garage opener’s Learn button until the light blinks.
Conclusion
Resetting your LiftMaster remote is simple and quick. Just follow the steps carefully for success. Clearing old codes helps keep your garage secure. Programming new remotes ensures smooth operation every time. Remember to test your remote after resetting it. Doing this regularly keeps your system working well.
Stay safe and enjoy hassle-free garage access.