Is your Epson printer acting up or stuck in an error state? Knowing how to reset your Epson printer can save you time, frustration, and unnecessary service calls.
Whether your print jobs won’t start, the device isn’t responding, or you need to clear a stubborn error, a reset often fixes these common issues quickly. In this guide, you’ll discover simple, clear steps to reset your Epson printer—ranging from quick soft resets to full factory restores.
By following along, you’ll get your printer back to smooth operation in no time. Ready to fix your Epson printer now? Let’s dive in.

Credit: central.toasttab.com
Reasons To Reset Epson Printer
Resetting an Epson printer can solve many common problems quickly. It helps clear errors, fix connection troubles, and resolve hardware glitches. A reset refreshes the printer’s system and often restores normal function without complex steps. Understanding why to reset your Epson printer helps you decide the right time to do it.
Clearing Print Job Errors
Print job errors can stop your printer from working. These errors happen when a document gets stuck in the print queue. Resetting the printer clears these stuck jobs. It allows new print jobs to start smoothly. This step often fixes issues like missing pages or partial prints.
Fixing Connectivity Issues
Printers often lose connection with your computer or network. This can cause failed prints or slow responses. A reset refreshes the printer’s network settings. It helps the printer reconnect to Wi-Fi or USB properly. This makes printing faster and more reliable again.
Resolving Hardware Glitches
Sometimes the printer’s hardware may freeze or act strangely. Buttons may stop responding or lights may blink oddly. Resetting the printer can clear these glitches. It restarts the hardware systems inside the printer. This often restores full function without needing repairs.
Soft Reset Method
The Soft Reset Method is the easiest way to fix small printer issues. It clears temporary errors without changing your settings. This method simply restarts the printer’s system. It helps refresh the device and can solve many common problems quickly.
This reset does not erase any saved data or preferences. It only stops current print jobs and clears minor glitches. The Soft Reset is safe and fast. It often works when the printer freezes or stops responding.
Power Cycle Steps
Start by turning off your Epson printer.
Unplug the power cord from the wall outlet.
Wait for about 60 seconds to let the printer fully shut down.
Plug the power cord back into the wall outlet.
Turn on the printer and wait for it to initialize.
Try printing a test page to check if the issue is fixed.
When To Use Soft Reset
Use a Soft Reset if your printer stops responding.
It helps when print jobs get stuck in the queue.
Try this method before doing a full factory reset.
A soft reset is useful after a power surge or network drop.
It can also fix minor software glitches without losing data.
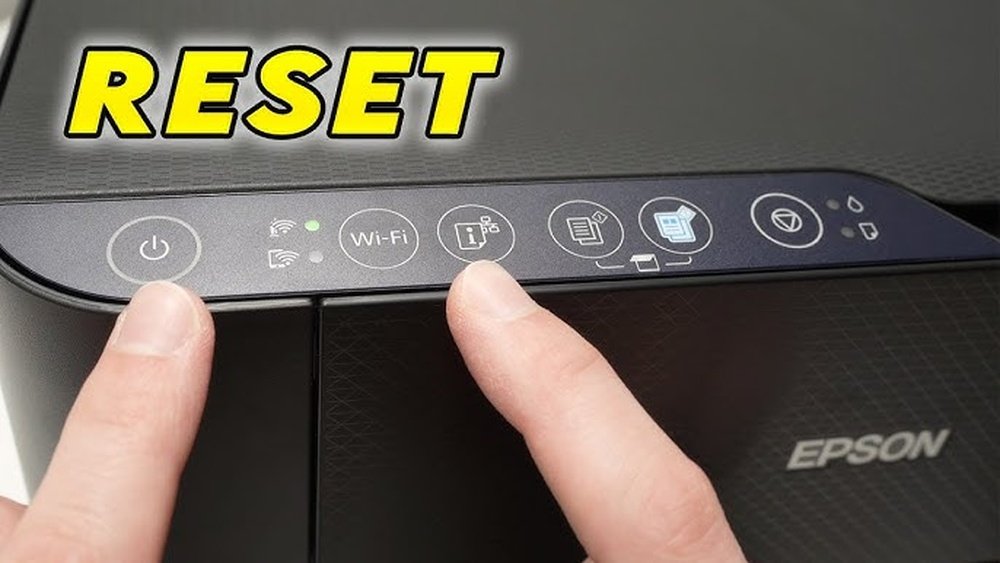
Control Panel Reset
The control panel reset is a quick way to fix many Epson printer problems. It lets you change settings or restore defaults using the printer’s screen. This method works well for minor errors or clearing specific issues without unplugging the printer.
You can access the setup menu to find reset options. Then, choose to restore all default settings or pick specific resets like network or print settings. This process is simple and does not affect your saved data.
Accessing Setup Menu
Turn on your Epson printer and wait for the screen to load. Use the control panel buttons to find the setup or home menu. Look for an icon that looks like a gear or wrench. Press the button to enter the setup menu.
Scroll through the options using arrow keys until you see “Restore Default Settings” or “Reset.” Select it to continue.
Restoring Default Settings
In the reset menu, choose “Restore Default Settings” to reset all options. This clears any changes and returns your printer to factory settings. Confirm your choice by pressing OK or Yes on the screen.
The printer will reboot or show a message when the reset is complete. This step often solves many printing or connection problems.
Choosing Specific Resets
If you want to keep some settings, choose specific resets instead of full reset. Options may include network settings, print settings, or maintenance data. Select the specific reset you need and confirm your choice.
This method is useful if only one part of the printer is causing trouble. It saves time and avoids losing all preferences.

Credit: www.youtube.com
Hard Reset Using Reset Button
Hard resetting your Epson printer using the reset button can fix many stubborn problems. This method clears errors that usual restarts cannot. It is a direct way to restore your printer’s basic functions.
Not all Epson models have a visible reset button. Some require a tool like a paperclip to access it. This guide covers how to locate and use the reset button safely.
Locating The Reset Button
The reset button is often small and recessed. Check the back or bottom of the printer. It may be near the power port or USB connections.
Look for a tiny hole labeled “Reset” or a small round button. Use a flashlight if needed. If you cannot find it, check your printer’s manual or Epson’s support site.
Performing The Paperclip Method
Unfold a paperclip to a straight shape. Turn off the printer and unplug it. Insert the paperclip gently into the reset hole.
Press and hold the reset button for 5 to 10 seconds. Release the button and plug the printer back in. Turn the printer on to start the reset process.
Confirming Successful Reset
The printer may restart automatically. Watch for normal startup sounds or lights. Check the printer’s display for error messages.
Print a test page to verify the reset worked. If errors persist, repeat the steps or try other reset methods. The reset button clears basic faults and often restores normal function.
Resetting Network Settings
Resetting network settings on your Epson printer helps fix connection problems. It clears old Wi-Fi data and allows you to start fresh. This process is useful if your printer can’t connect to the internet or your home network has changed. Resetting network settings is simple and takes only a few minutes.
After resetting, you will need to reconnect the printer to your Wi-Fi. Follow the steps carefully to avoid errors. This ensures smooth printing and scanning without interruptions. The instructions below guide you through resetting Wi-Fi and reconnecting to your network.
Wi-fi Reset Steps
Turn on your Epson printer and go to the control panel. Find the “Setup” or “Network” menu. Select “Restore Network Settings” or “Reset Network.” Confirm your choice to reset the Wi-Fi settings. The printer will erase saved networks and restart the network system.
Wait for the printer to finish the reset process. Lights may blink or the screen may show messages. Do not turn off the printer during this time. The reset clears old Wi-Fi connections and prepares your printer for new setup.
Reconnecting To Network
Open the printer’s control panel and select “Wi-Fi Setup.” Choose “Wi-Fi Setup Wizard” or similar option. The printer will search for available networks. Find your Wi-Fi name (SSID) in the list. Select your Wi-Fi network and enter the password carefully.
After entering the password, the printer will connect to your Wi-Fi. A confirmation message or light will show successful connection. Print a test page to check if the printer is online. Your Epson printer is now ready to use on the network again.
Credit: central.toasttab.com
After Reset Setup
After resetting your Epson printer, setting it up correctly is important. This step ensures your device works smoothly. You must reconfigure settings and test the printer. These actions help avoid future printing problems.
Reconfiguring Printer Settings
Start by turning on the printer. Access the control panel or printer software on your computer. Set the language, date, and time. Connect the printer to your Wi-Fi or network if needed. Adjust print quality and paper size settings. Save changes to apply new configurations. Check ink levels and replace cartridges if required. Proper settings prevent errors and improve print results.
Running Test Prints
Print a test page to check printer status. This page shows color and alignment accuracy. Use the control panel or printer software to start the test. If the test print has issues, try cleaning print heads. Repeat the test print after cleaning. Confirm the printer prints clearly and without streaks. Test prints ensure your Epson printer is ready for use.
Troubleshooting Common Issues
Troubleshooting common issues with your Epson printer helps restore normal function fast. Many problems arise from simple causes. Identifying the root issue avoids unnecessary repairs or replacements. Basic checks often solve unresponsive printers, power problems, and error messages.
Printer Not Responding
Start by checking if the printer is turned on. Sometimes the printer is off or in sleep mode. Press the power button to wake it up. Confirm the printer is connected to your device via USB or WiFi. Restart your computer and printer to refresh communication. Clear any stuck print jobs in the print queue. These steps usually fix non-responsive printers.
Power And Cable Checks
Verify the power cable is firmly plugged into the printer and outlet. Loose cables cause power failure or intermittent issues. Inspect the cable for any visible damage or fraying. Replace the cable if damaged. Use a different power outlet to rule out outlet problems. Ensure USB or network cables are secure and undamaged. Simple cable problems often stop printers from working properly.
Error Message Fixes
Read the error message on the printer display carefully. Common errors include paper jams, low ink, or connectivity issues. Clear paper jams by gently removing stuck paper. Replace empty ink cartridges with new ones. Reset the printer after fixing the error to clear the message. Consult your Epson manual for specific error codes. These fixes usually solve common Epson printer errors quickly.
Tips To Avoid Future Errors
Preventing future errors on your Epson printer helps keep it running smoothly. Taking simple steps can reduce the need for frequent resets. Small efforts go a long way in avoiding common issues and saving time.
Regular Maintenance
Clean your printer regularly to remove dust and ink buildup. Use a soft, lint-free cloth and avoid harsh chemicals. Check ink levels often and replace cartridges before they run out. Clear paper jams carefully to avoid damaging the printer parts. Performing these tasks keeps your printer in good shape and reduces errors.
Firmware Updates
Keep your printer’s firmware up to date. Updates fix bugs and improve performance. Visit Epson’s official website to check for the latest firmware for your model. Install updates as soon as they are available. Updated firmware helps your printer work better and avoids many common problems.
Proper Shutdown Practices
Turn off your printer using the power button, not by unplugging it. This allows the printer to finish all tasks safely. Avoid cutting power during printing or cleaning cycles. Proper shutdown prevents data corruption and hardware issues. Following this habit protects your printer’s longevity and reliability.
Frequently Asked Questions
How To Manually Reset A Printer?
To manually reset a printer, turn it off and unplug the power cord. Wait 30 seconds, plug it back in, and turn it on. For advanced reset, use the printer’s menu to restore default settings or press the hidden reset button while powering on.
How Do I Reset My Epson Printer To Wifi?
Turn off your Epson printer and unplug it. Press and hold the WiFi and Cancel buttons simultaneously. Release when lights flash. Wait until lights stop flashing. Your printer resets WiFi settings. Then reconnect it to your network via the printer’s setup menu.
How Do I Fix My Epson Printer That Is Not Responding?
Check the power and USB cables for secure connections. Restart both printer and computer. Unplug the printer for 60 seconds, then plug in and turn on. Update or reinstall printer drivers. Perform a factory reset via the printer menu if problems persist.
Why Do We Need To Reset An Epson Printer?
Resetting an Epson printer clears print job errors and resolves glitches. It restores normal function and fixes unresponsive issues quickly.
How Do I Reset My Epson Printer To Factory Settings?
Use the printer’s Setup or Home menu, find “Restore Default Settings,” and confirm to reset all settings.
Conclusion
Resetting your Epson printer can solve many common issues fast. Start with a simple power cycle to fix minor glitches. Use the menu options for a full factory reset if needed. Always follow the steps carefully to avoid errors. After resetting, test your printer to ensure it works well.
Regular resets help keep your printer running smoothly. Stay calm and patient during the process. Your Epson printer will be ready to print again in no time.