Are your solar lights not shining as brightly as they used to? Maybe they flicker or won’t turn on at all.
Don’t worry—you don’t have to toss them out or buy new ones just yet. Sometimes, all your solar lights need is a simple reset to bring them back to life. In this guide, you’ll learn easy and effective steps to reset your solar lights, so they work like new again.
Whether it’s cleaning the solar panel, replacing batteries, or repositioning them for better sunlight, you’ll find practical tips that anyone can follow. Keep reading and get ready to enjoy your glowing garden or pathway lights once more!
Clean Solar Lights
Cleaning solar lights is an important step in maintaining their performance. Dirt and grime can block sunlight, reducing the charging ability. Regular cleaning helps the solar panel absorb maximum sunlight. This ensures the lights work efficiently and last longer.
Wash Exterior And Panel
Start by washing the entire solar light. Use warm, soapy water with a mild dish soap. Gently scrub the plastic cover and solar panel with a soft cloth or brush. Avoid harsh scrubbing to prevent damage to the panel. Clean all sides of the light to remove dust and stains.
Remove Dirt And Grime
Focus on removing stuck dirt and grime on the solar panel surface. Use a soft toothbrush or sponge for stubborn spots. Take care not to scratch the panel. Dirt buildup blocks sunlight and lowers the light’s brightness. Clean the light sensor area as well, so it detects darkness properly.
Dry Completely
After washing, dry the solar light fully before use. Use a soft, dry cloth to wipe off water. Leave the light in the sun to air dry if needed. Moisture inside the light can cause damage or short circuits. Ensure all parts are dry to keep the light working well.

Credit: gulfeshop.com
Fix Cloudy Panels
Cloudy solar panels reduce light absorption and lower your solar lights’ performance. Dust, dirt, and residue build up on the panels over time. Fixing cloudy panels helps restore energy collection and prolongs light life.
Cleaning the panels carefully removes this buildup. Use gentle methods to avoid damage and maintain panel clarity. Proper care keeps your solar lights working well for longer.
Choose Cleaning Method
Pick a cleaning method based on the panel’s dirt type and sensitivity. Mild soap with warm water works well for most dirt. Use a soft cloth or brush to gently scrub the surface.
Avoid harsh chemicals or abrasive tools. They can scratch or harm the solar panel’s surface. For stubborn grime, repeat cleaning but keep pressure light.
Protect Solar Panel Surface
After cleaning, protect the panel to prevent quick re-clouding. Dry the surface with a soft cloth to avoid water spots. Avoid touching the panel with bare hands to reduce oil smudges.
Place solar lights where they get enough sunlight but avoid areas prone to dirt or debris buildup. Regular checks and cleaning keep panels clear and efficient.
Replace Batteries
Replacing the batteries is a key step to reset solar lights. Over time, rechargeable batteries lose their ability to hold a charge. New batteries ensure your solar lights work properly and shine bright again.
Follow simple steps to open the light, select the right batteries, and install them carefully. This process restores power and improves light performance quickly.
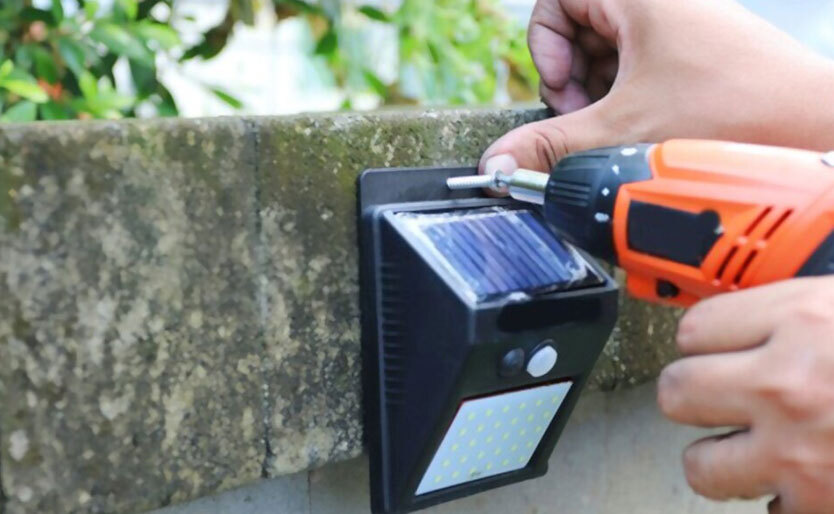
Open Light Housing
Locate the solar light’s housing. Usually, it twists or snaps open.
Gently twist or press to open the cover. Avoid using force to prevent damage.
Inside, you will see the battery compartment holding the old batteries.
Select Correct Battery Type
Check the old batteries for type and size. Most solar lights use NiMH or NiCd rechargeable batteries.
Match the voltage and size exactly. Using the wrong battery can harm the light.
Purchase new rechargeable batteries of the same type for best results.
Install New Batteries
Remove the old batteries carefully. Dispose of them properly according to local rules.
Insert the new batteries, aligning the positive and negative ends correctly.
Close the light housing firmly. Test the light by covering the solar panel to trigger the sensor.
Test And Reassemble
After cleaning and replacing the batteries in your solar lights, testing and reassembling is the next important step. This process checks if everything works correctly before placing the lights back outside. Careful testing helps avoid wasting time on repeated fixes. Follow these simple steps to secure connections, cover the sensor, and ensure proper assembly for a smooth reset.
Secure Connections
Check all wires and battery contacts inside the light. Make sure they are tight and clean. Loose or dirty connections can stop the light from working. Use a small cloth to wipe contacts if needed. Press each wire firmly into place. This step ensures power flows properly from the battery to the solar panel and LED bulb.
Cover Sensor To Check Light
Solar lights turn on when dark. Cover the sensor with your finger or a small cloth. Wait a few seconds. The light should turn on if the sensor and battery work well. If it stays off, double-check the batteries and wiring. Testing the sensor helps confirm the light reacts to darkness as it should.
Ensure Proper Assembly
Put the solar light parts back together carefully. Align each piece exactly as before. Tighten screws or twist parts firmly. Avoid forcing parts to prevent damage. Proper assembly protects the solar panel and sensor from weather. It also keeps the battery and bulbs in place for long-lasting use.
Optimize Placement
Optimizing the placement of your solar lights is crucial for their proper reset and long-term performance. Proper positioning ensures the solar panels receive enough sunlight to recharge the batteries fully. Poor placement can lead to dim lights or failure to turn on.
Find Sunny Location
Place solar lights in areas with direct sunlight. Choose spots that receive at least six hours of sun daily. Morning sun is best because it is less intense and lasts longer. Avoid north-facing areas that get less light.
Avoid Shadows And Obstructions
Check for trees, buildings, or objects that cast shadows on the solar panels. Shadows reduce the panel’s ability to absorb sunlight. Keep the panels clear of leaves, dirt, and snow. Ensure no wires or garden decorations block the light.
Credit: getquickspark.com.au
Quick Reset Tips
Resetting solar lights can quickly bring them back to life. Sometimes, a simple reset solves charging or lighting issues. Follow these quick reset tips for a fast fix.
Turn Off And Disconnect Batteries
Start by switching off the solar light. Open the battery compartment carefully. Remove the batteries from the light. This step stops all power flow and clears minor glitches.
Wait Before Reconnecting
Leave the batteries out for at least five minutes. This pause helps reset the internal system fully. Avoid rushing to put the batteries back immediately.
Check On/off Switch
Before reinserting batteries, examine the on/off switch. Make sure it moves freely and clicks into place. A stuck switch can prevent the light from turning on.
Sensor Maintenance
Proper sensor maintenance keeps your solar lights working well. Sensors detect darkness and trigger the light. Dirt or damage can stop this process. Regular checks help the sensor perform its job. Follow these simple steps to maintain the sensor on your solar lights.
Clean Photocell Lens
The photocell lens senses light levels outside. Dirt, dust, or spider webs block its view. Use a soft cloth or brush to clean the lens gently. Avoid harsh chemicals that can damage the lens. Clean the lens weekly for best results. A clear lens ensures the light turns on at night.
Inspect Wiring
Wiring connects the sensor to the solar light’s battery and bulb. Check for loose or broken wires. Look for signs of rust or corrosion at connection points. Repair or replace any damaged wires quickly. Proper wiring helps the sensor send signals without interruption.
Adjust Or Repair Sensor
Sometimes, the sensor may need adjustment. Make sure it faces the right direction to detect daylight accurately. If the sensor does not respond, test it with a flashlight. Replace the sensor if it remains unresponsive. Repairing or adjusting keeps your solar light reliable.

Credit: beyondsolar.net
Troubleshooting Common Issues
Troubleshooting common issues with solar lights helps restore their brightness. Solar lights may fail to charge or turn on properly. Simple checks can identify the problem before replacing parts. Follow these steps to diagnose and fix common issues quickly.
Check Full Charge
Ensure your solar light receives enough sunlight daily. Clean the solar panel surface to remove dirt and dust. Place the light in direct sunlight for at least 6 hours. A low or no charge often causes dim or no light. Confirm the light’s charging indicator is on, if available.
Inspect For Damage
Look closely at the solar panel and light housing for cracks or breaks. Check the wiring connections inside the light for corrosion or loose parts. Water damage can cause failures; ensure the light is sealed properly. Replace any damaged parts to restore function.
Consider Battery Replacement
Solar lights use rechargeable batteries that wear out over time. Open the light casing to access the battery compartment. Remove old batteries and note their type and voltage. Replace with new batteries of the same type to ensure compatibility. New batteries can improve light duration and brightness.
Frequently Asked Questions
How To Get Solar Lights Working Again?
Clean the solar panel and sensor with a soft cloth. Replace old batteries with new rechargeable ones. Reset by disconnecting batteries briefly. Place lights in direct sunlight for several hours daily. Reassemble and test by covering the sensor to check light activation.
How To Fix A Solar Light Sensor?
Clean the sensor and solar panel with a soft cloth. Replace old batteries. Reset by disconnecting power briefly. Ensure full sun exposure and secure connections.
How Do I Reset A Solar System?
To reset a solar system, turn it off, disconnect the batteries for a few minutes, then reconnect them. Clean the solar panel and sensor. Replace old batteries if needed. Finally, place the system in direct sunlight to recharge and test its operation.
Where Is The On/off Switch On Solar Lights?
The on/off switch on solar lights usually sits under the light’s cover or base. Look for a small toggle or button. Some models activate automatically at dusk without a manual switch. Check the user manual for exact switch location and operation details.
How Do You Reset Solar Garden Lights Easily?
Turn off the light, remove batteries for a few minutes, then reinstall and switch it on.
Conclusion
Resetting solar lights helps restore their brightness and performance. Start by cleaning the panels and replacing old batteries. Test the lights after reassembling to ensure they work properly. Place them where sunlight reaches directly for several hours daily. Small fixes like repositioning or disconnecting batteries briefly can also help.
Regular care keeps your solar lights shining longer. Simple steps make maintenance easy and effective. Keep your outdoor space bright and energy-efficient with well-maintained solar lights.